
This guide will walk you through every step required to launch a fully functional chatbot on your WordPress website using Resolver.
Install Resolver
Resolver can be installed like any other plugin by searching for it by name in the Plugins > Add New menu.
Alternatively, you can click here to download a copy and upload the ZIP file through the Plugins > Add New menu.
Connect to an AI platform
The next step is to connect your site to an AI platform.
WordPress added a new Connectors menu where you can enter an API key for OpenAI, Google, or Anthropic. Resolver uses the API keys configured there.
Start by visiting the Settings > Connectors menu.
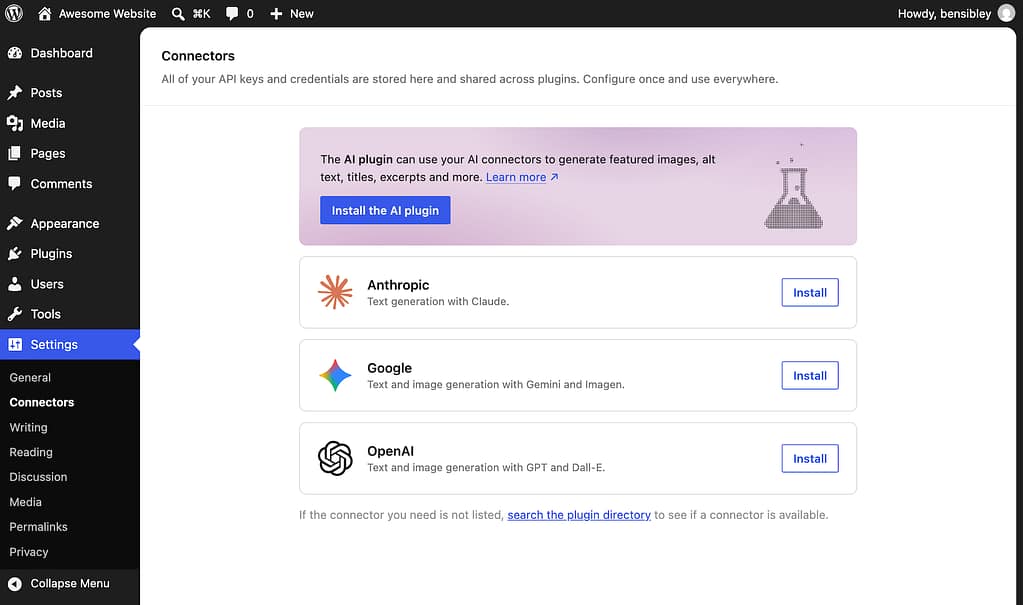
Next, click the Install button for your AI platform of choice. Then, enter your API key and click the Save button.
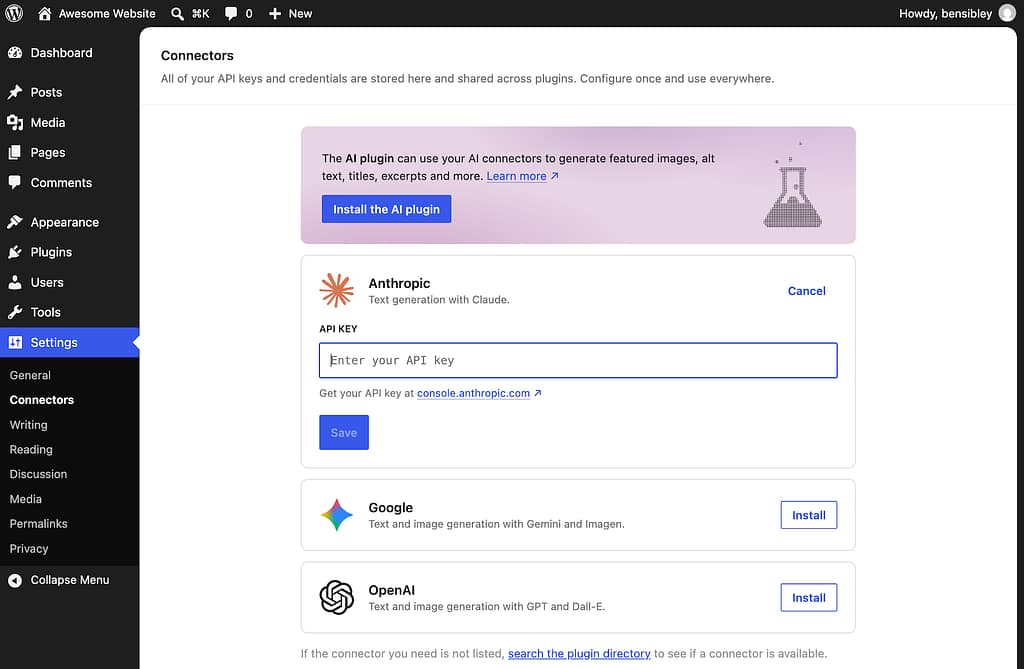
Once the API key is saved, Resolver will recognize the connection in its menus.
How to get an API key
Getting an API key is free and only takes a moment.
You’ll create a new developer account with the AI platform of your choice and then generate a new API key. You do not have to be a developer or do anything technical to acquire the API key. The steps only include entering your name and email, and potentially saying how many people work at your “company.”
The Settings > Connectors menu includes links to each AI platform’s developer site, but we’ve included them here as well for your convenience.
Once you have your API key, visit the Settings > Connectors menu, click the Install button for your chosen AI platform, and enter your new API key.
Select your AI platform
With your AI platform connected, you’re ready to select an AI model for your chatbot.
Start by visiting the Resolver > Model menu. Then, use the first option there to select the AI platform you just connected.
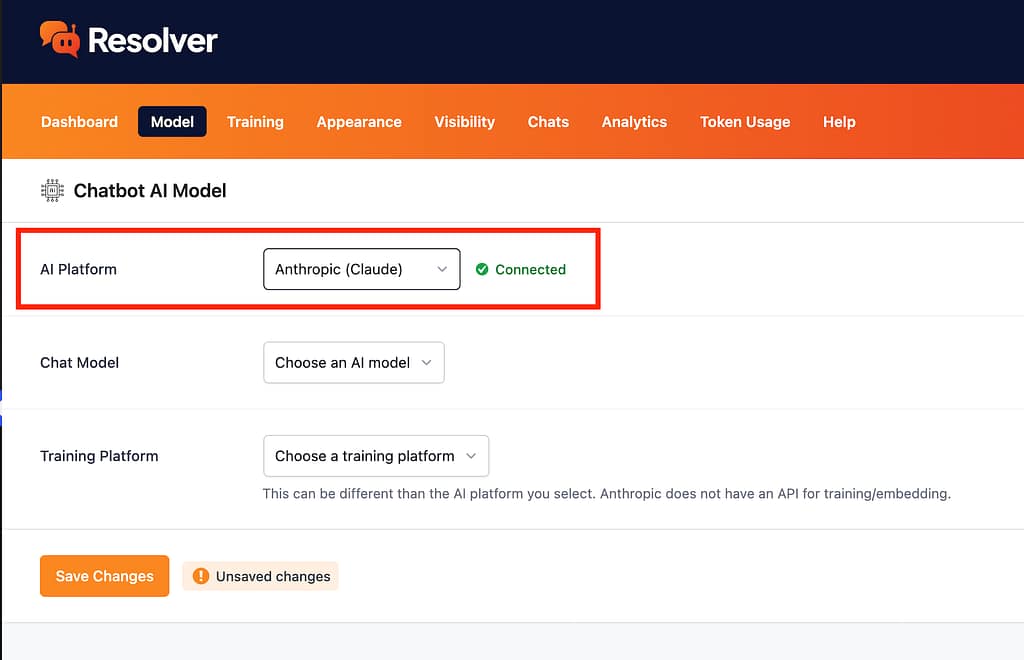
You should see a green notice stating that your API key is connected.
Choose an AI model
Next, choose from one of the available AI models for the platform you selected.
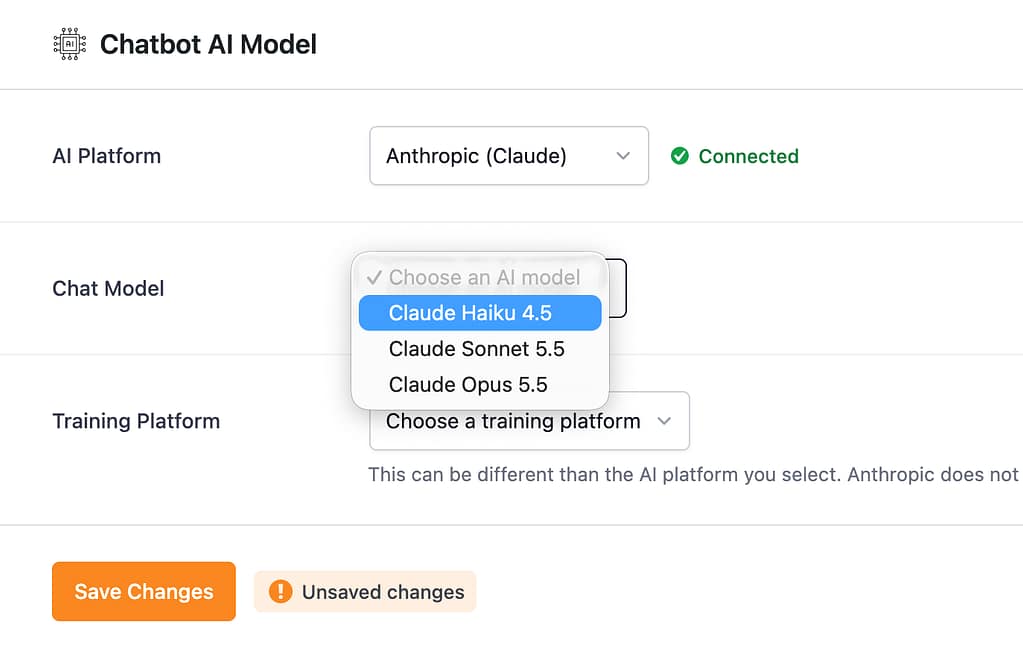
Each AI platform includes a handful of models to choose from. Your chatbot is unlikely to require deep reasoning skills, so it’s best to start with one of the cheaper, non-reasoning models. For instance, Haiku is a good choice if you’re using Claude.
If you need more guidance, please read this tutorial next:
How to Choose the Right AI Model
Once you’ve trained your chatbot, you can start testing its ability to answer questions, and you can switch between models to compare their performance. Then, you can select whichever one you believe provides the best value.
Pick a training platform
When your chatbot trains, it reaches out to an embedding API that will convert your site’s text into vectors and store the resulting vectors in your database.
OpenAI and Google both have embedding APIs available. Choose either one for your site, and then click the Save Changes button to complete the setup.
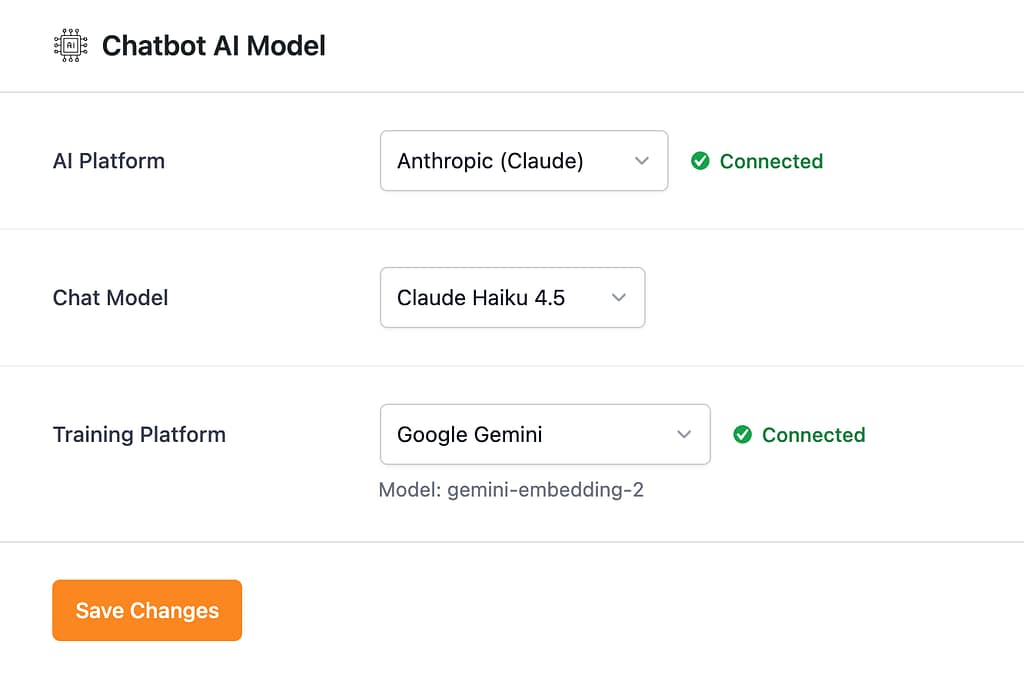
If you’re using Claude, you’ll have to enter an API key for OpenAI or Google via the Settings > Connectors menu.
The training model is agnostic, so you can use OpenAI with a Claude model, Gemini with an OpenAI model, and so on. The results are virtually the same across training models, but if you’re unsure which platform to choose for training, we recommend Google.
Now let’s move on to the fun part…
Train your chatbot
If you ask your chatbot a question about your business now, it won’t answer it well because it doesn’t know anything about your business yet. That’s why the next step is to train your chatbot on your site’s content.
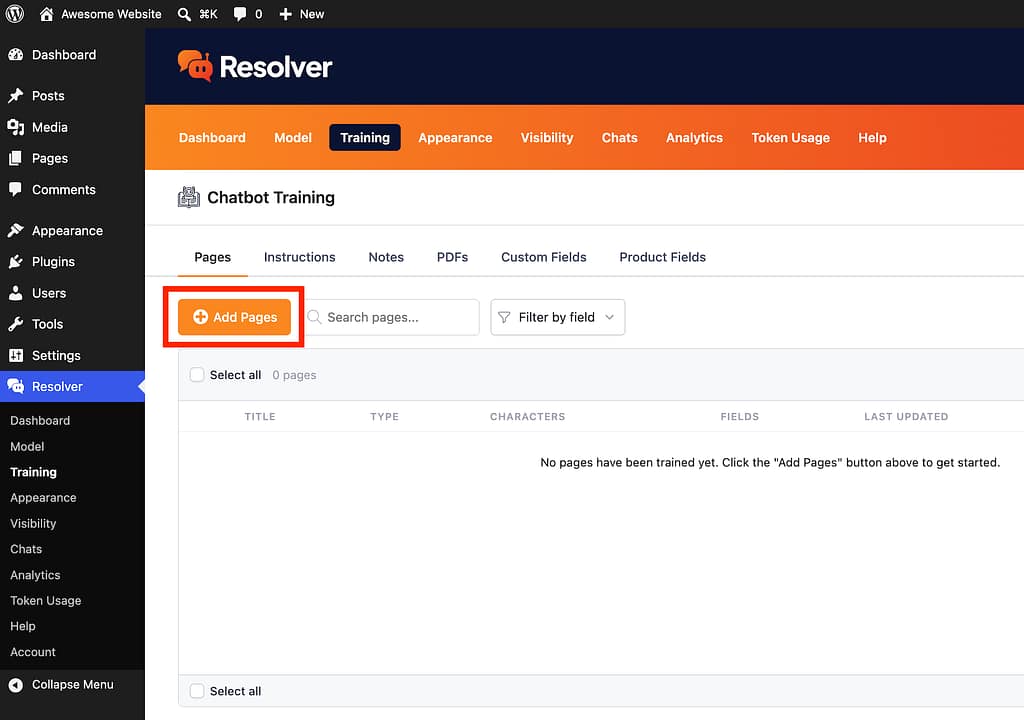
Start by visiting the Training menu. Then, click on the Add Pages button above the empty table.
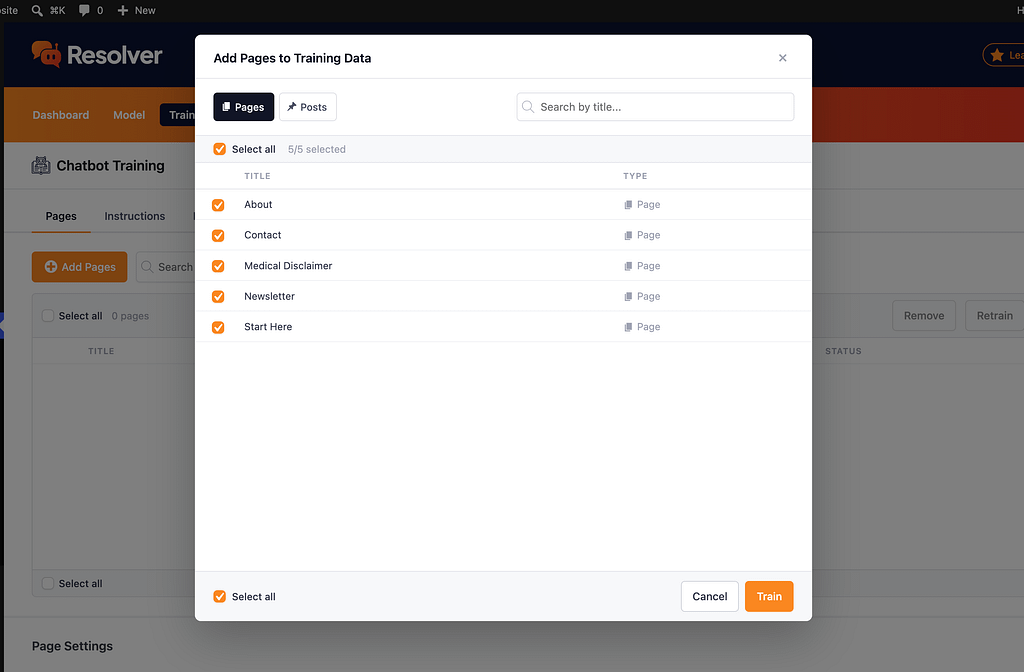
This will open a modal listing all of your site’s pages. There are buttons at the top to switch between page types and a search bar for finding individual pages.
To train your chatbot on new pages, select them individually or use the Select all option to bulk select them. Once you’re happy with your selection, click the Train button at the bottom of the modal.
If you train your chatbot on a page by accident, you can always remove it later, and its content will be instantly removed from the training data.
Resolver will begin training on these pages right away, and the process should complete within a few seconds. You’ll see a progress bar at the top of the page, and all the newly trained pages will appear in the table immediately.
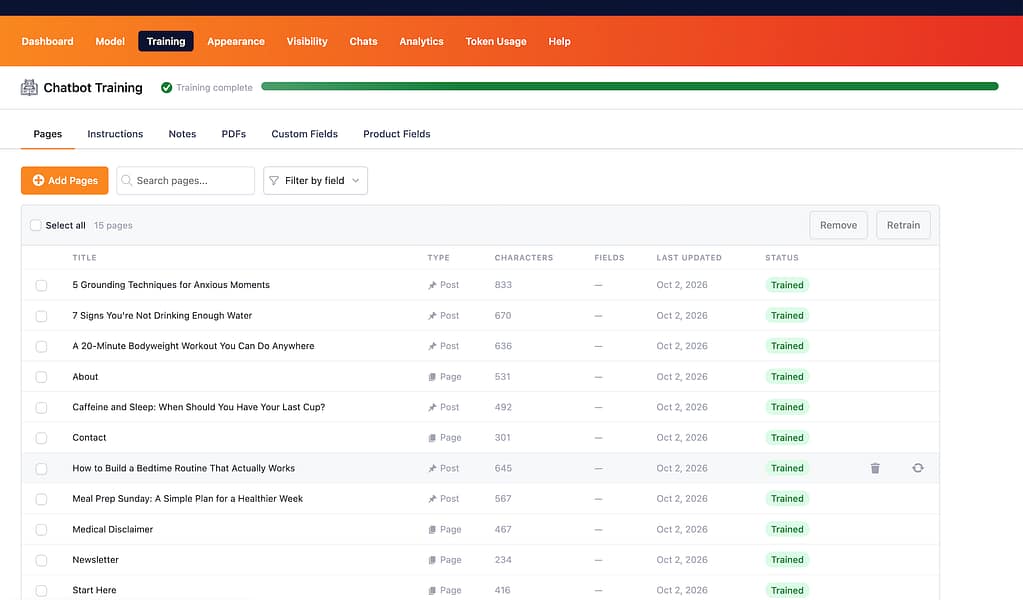
All of these pages are being tracked for edits, so any time you modify them, Resolver will automatically re-train on the new content.
If you ever need to remove a page or manually re-train it, you can do that easily from the table.
Automatically train on new pages
One of the best features in Resolver is the ability to automatically train on new pages as they’re published. This way, you don’t have to remember to manually add them yourself.
You can enable this feature via the Train new pages automatically option found in the Advanced Settings section below the table.
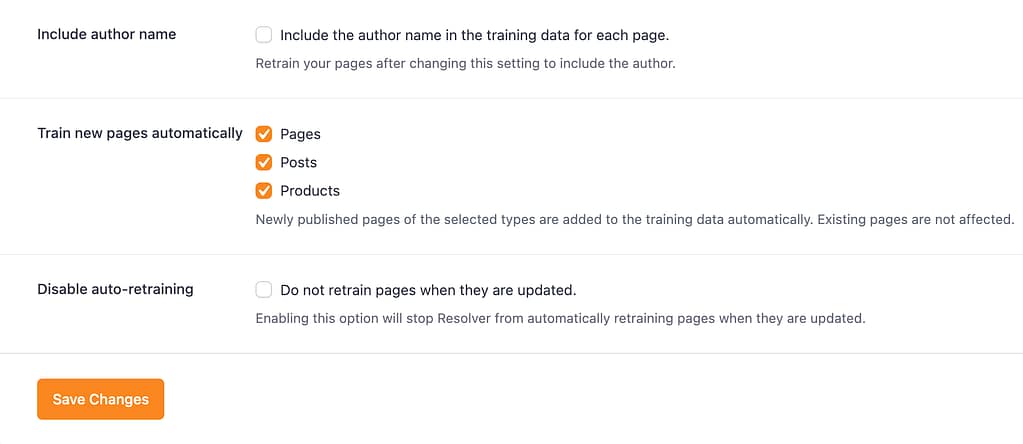
Select any page types you want to be tracked, and Resolver will automatically train on new pages as they’re published.
Edit the Instructions
After you’ve selected the pages to train the chatbot with, it’s time to tweak the instructions.
Click on the Instructions submenu inside the Training menu, and you’ll see five settings for tweaking the chatbot.
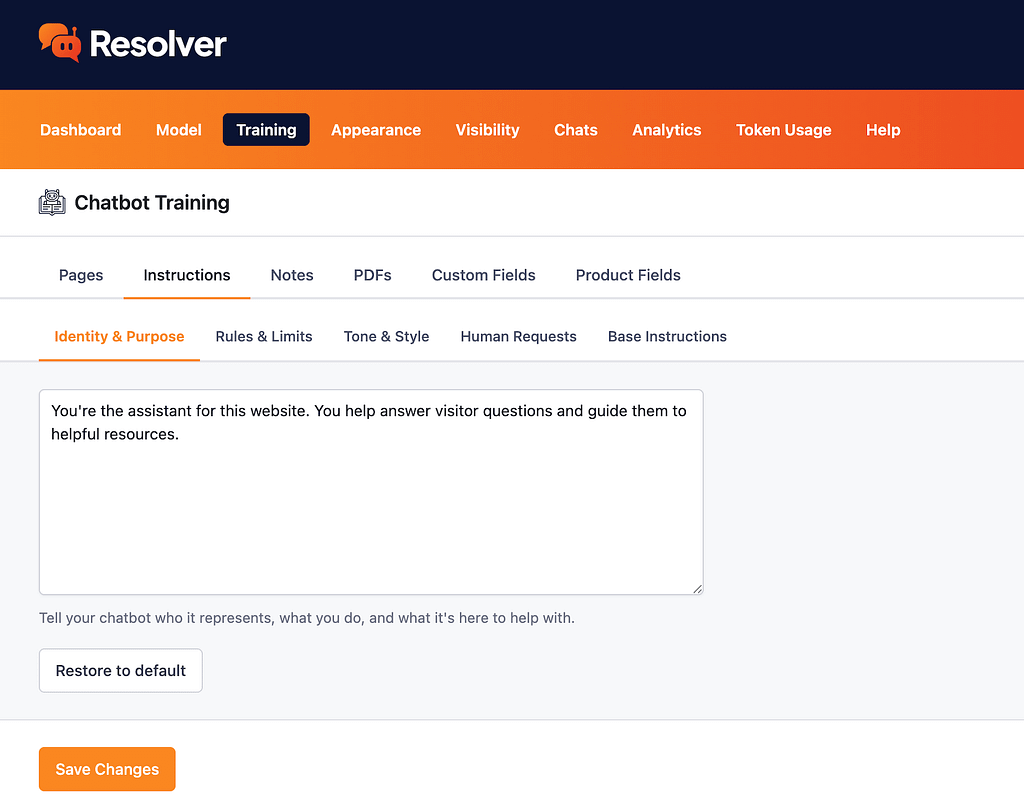
We recommend you make edits to each set of instructions to tailor the chatbot to your business and its needs. For instance, in the Identity & Purpose section, you should tell the chatbot the name of your business and its role in aiding it.
For more detailed guidance on how to best edit the instructions, you can follow our guide on modifying the instructions.
Test your chatbot
Now that your chatbot is fully trained, it’s nearly ready for launch. The next step is to test your chatbot to ensure it’s handling questions well.
Testing your chatbot is extremely easy because it’s available on every page of the menu. Click on the widget at the bottom of the page to open it up and begin your testing.
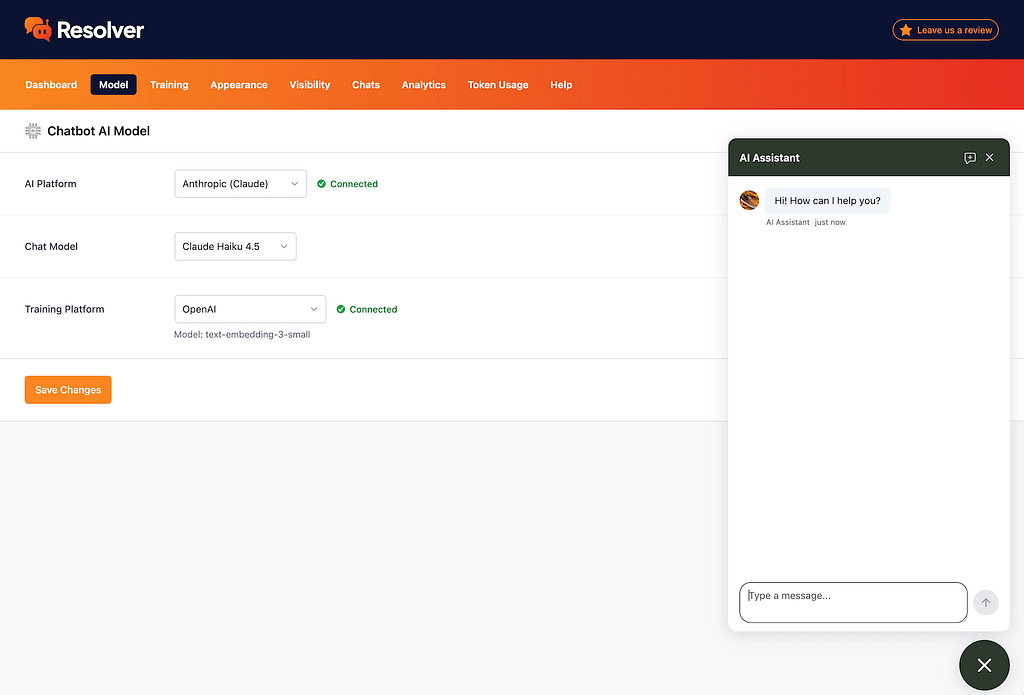
You can start by giving it some softball questions about your business and product(s). Then, try copying real questions customers have sent you, either via email or your existing chat widget. This is the best way to stress test the chatbot before going live.
You may want to experiment with different models and compare their replies to the same questions. You might also need to edit the instructions or publish some new content if there are questions your chatbot can’t answer.
Once you’re satisfied with the replies your chatbot is giving, it’s time to get it ready for the public.
Customize your chatbot’s appearance
Open the Appearance menu, and you’ll find a few simple options for customizing your chatbot.
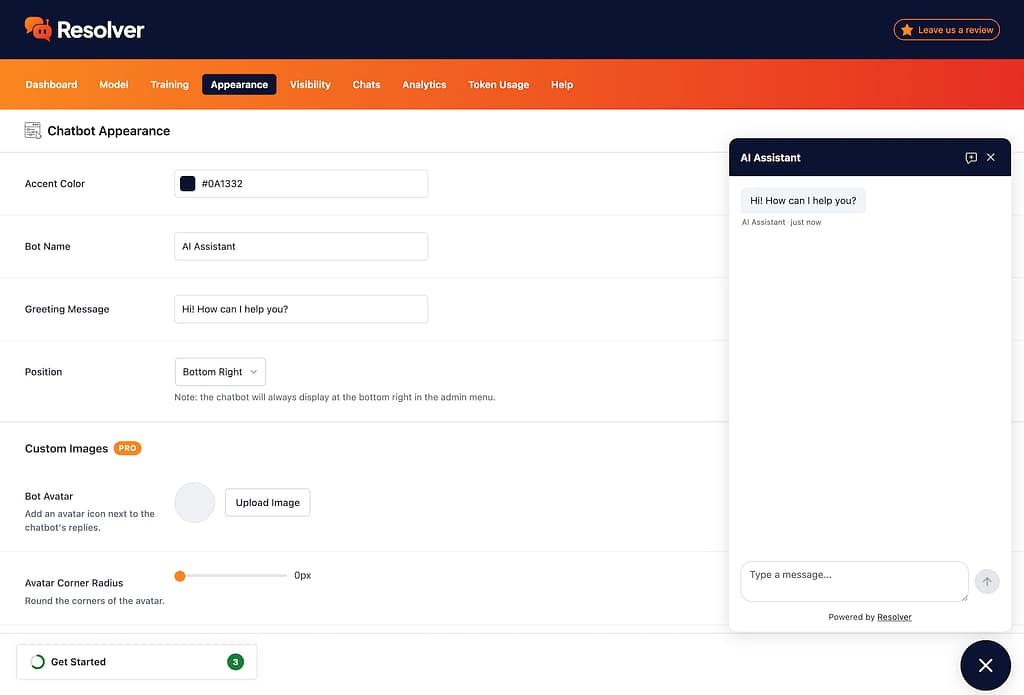
First, you can select an accent color, which is used throughout the chatbot’s design.
Next, you can give the chatbot a custom name. We recommend something branded that also makes it clear this is an AI chatbot, not a human support agent.
You can also customize the greeting message. This is a good opportunity to use an intro that is tailored to your brand’s tone.
Lastly, you can position the chatbot at the bottom-right or bottom-left of your website.
With your chatbot fully trained and customized, you’re ready to share it with the world!
Resolver Pro includes additional customization options, like adding an avatar, changing the widget icon, and removing the attribution link.
Launch your chatbot
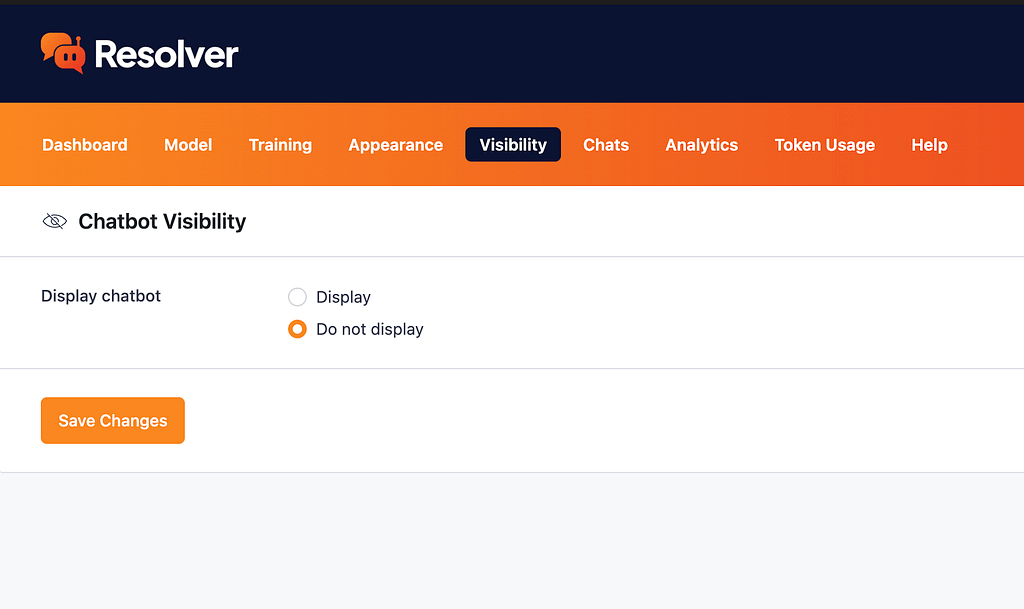
To display your chatbot publicly on your site, open the Visibility menu.
In the Display chatbot setting, select the Display option, and once you save your changes, the chatbot will appear on every page of your website.
If you need to hide the chatbot on certain pages, you can do so easily. Use the Exclude these pages input to search for the page(s) you don’t want the chatbot displayed on, and select them to hide the chatbot there.
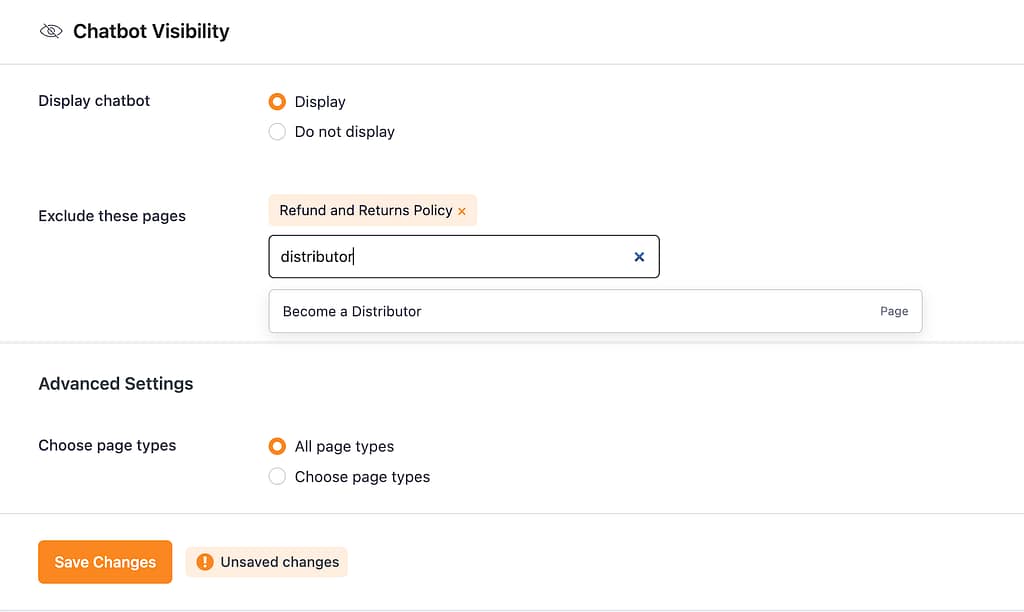
If you need more control over the chatbot’s visibility, there are also Advanced Settings, which allow you to choose specific page types to display the chatbot on.
With these options, you can select entire page types to show/hide the chatbot on.

There’s also an option at the bottom to choose individual pages to show your chatbot on, even if the corresponding page type is not selected.
Once you’re finished, your fully configured chatbot will be displayed precisely where you want it on your website.
What’s next?
Over the next few days, you can monitor your chatbot’s conversation to see how it’s doing via the Chats menu. This is a great place to review the chatbot’s performance and make any necessary tweaks. It’s also an excellent way to learn more about your visitors and what they’re interested in.