
This feature is only available in Resolver Pro.
Resolver Pro lets you choose which custom fields you want to include in the training data. It does this through both manual entry and automatic detection of custom fields.
Tracking fields via plugin integration
Resolver Pro integrates with the following custom field plugins:
- Advanced Custom Fields
- CMB2
- Meta Boxes
- Pods
- Secure Custom Fields
If you are using any of these plugins, you’ll see their fields show up automatically in the Training > Custom Fields menu.
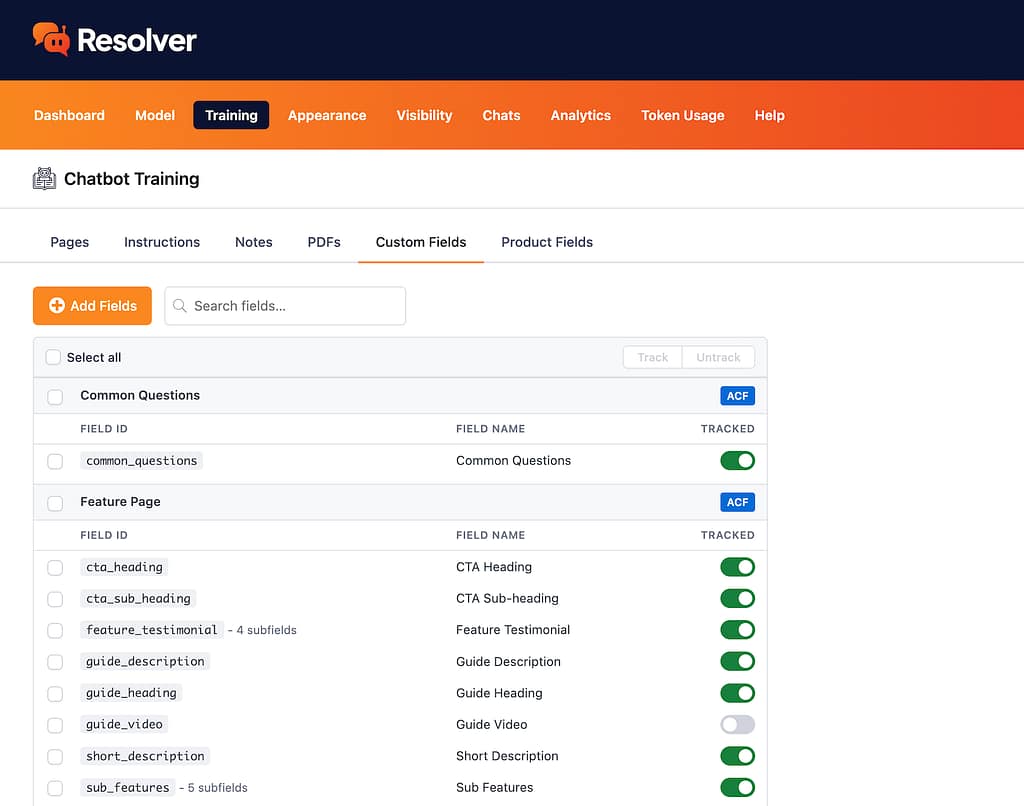
The fields are organized into the field groups created with the plugin.
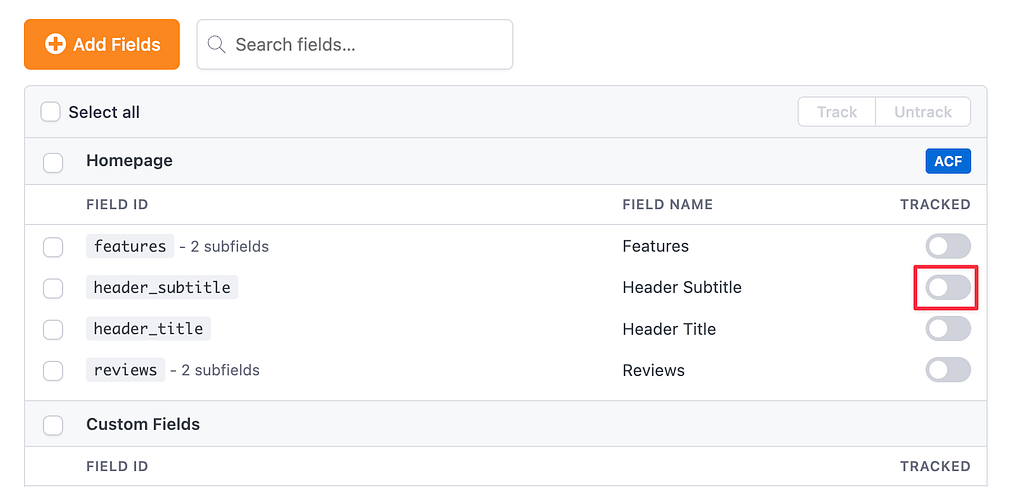
To track a new custom field, locate the field you want to track, then click on the toggle button in the Tracked column.
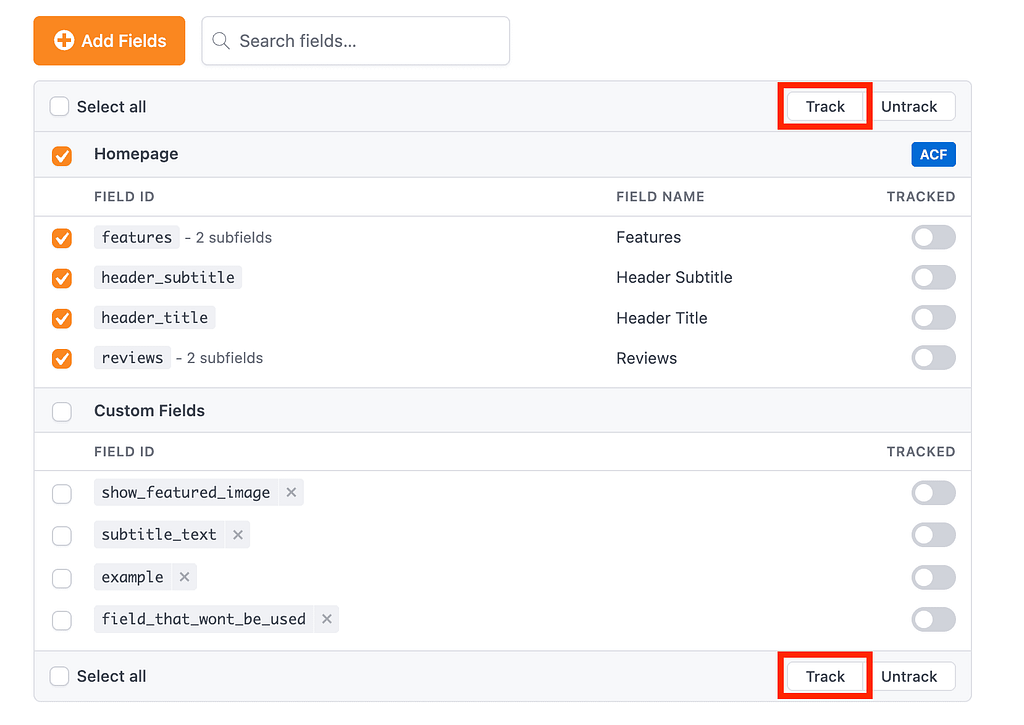
If you want to track many or all custom fields, use the checkbox next to the group title to select all its fields, or use the Select all checkbox to select all fields in all groups. Then, click the Track button at the top or bottom of the table to track these fields.
When you track a new custom field, you are telling Resolver Pro to include its contents when training from now on. However, it does not immediately trigger a retraining of all pages. That’s why you’ll see a prompt at the bottom of the page whenever you track or untrack a field.
Click the Retrain button in this prompt to retrain all of your pages, and the content from the custom fields you’ve just tracked will be found and included in the training data.
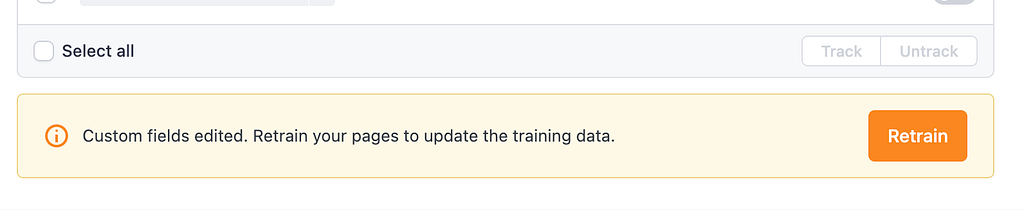
If, for some reason, you navigate away from the page before clicking the Retrain button, you can visit the Training > Pages menu, select all the pages, and click the Retrain button there instead.
Tracking custom fields manually
If you have manually created your custom fields instead of using a plugin, these can be tracked too.
To track a new field, click the Add Fields button at the top of the page.
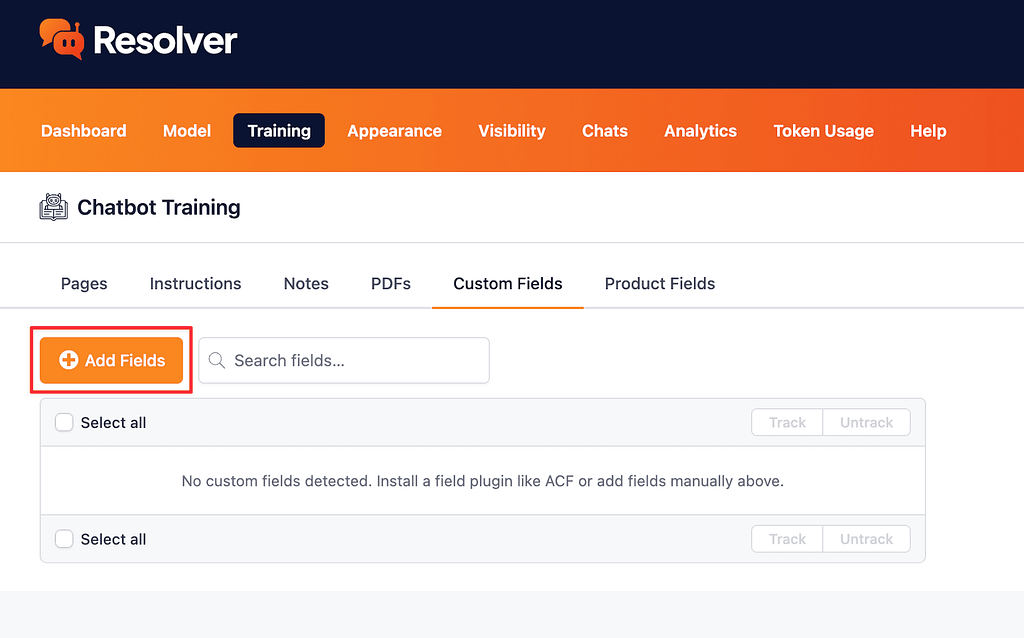
In the modal that appears, you can paste in the names of the fields or type them into the input. Add a comma or hit Enter after each one to enter a new field. Once you’re happy with the fields you’ve entered, click the Track button at the bottom of the modal.
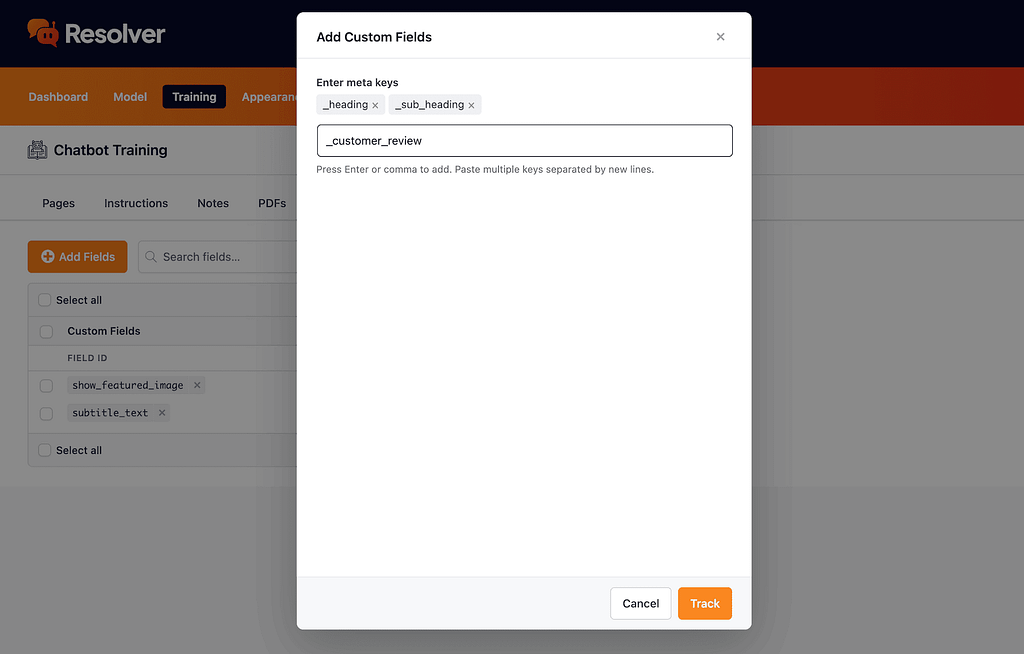
Make sure that you are entering the meta key for the fields exactly, including the underscore at the beginning if one is used.
You’ll see the newly tracked fields added to the page immediately. Click the Retrain button in the prompt at the bottom of the page to retrain all your pages and include the new custom fields’ content in the training data.
Untracking a custom field
To remove a custom field from the training data, first untrack it.
Start by visiting the Resolver > Training > Custom Fields menu and locating the field you wish to untrack. Then, click the toggle button in the Tracked column to untrack the field.
Alternatively, you can use the checkboxes to select multiple fields, and then click the Untrack button in the toolbar to untrack these fields.
Untracking a field does not automatically remove its content from the existing training data. That’s why you’ll see a prompt to retrain your pages after making this edit. Once you retrain your pages, content from the untracked custom field will be removed from the training data.
If the custom field is only used on a small number of pages, you could instead open the Training > Pages menu and retrain any pages that include this custom field.